Tiny in size, big in taste. And good for the planet, to boot.
Microgreens are having their moment in the sun. Seed catalogs feature microgreen sections and you’ll find them at farmers markets and supermarkets. There’s a lot to love about these fluffy little greens, including their small footprint, requiring fewer resources than traditionally farmed food — much less soil, 95 percent less water, and no herbicides, pesticides, or fertilizer.
They can be grown in small spaces indoors, year-round, in cities, in greenhouses — and at home.
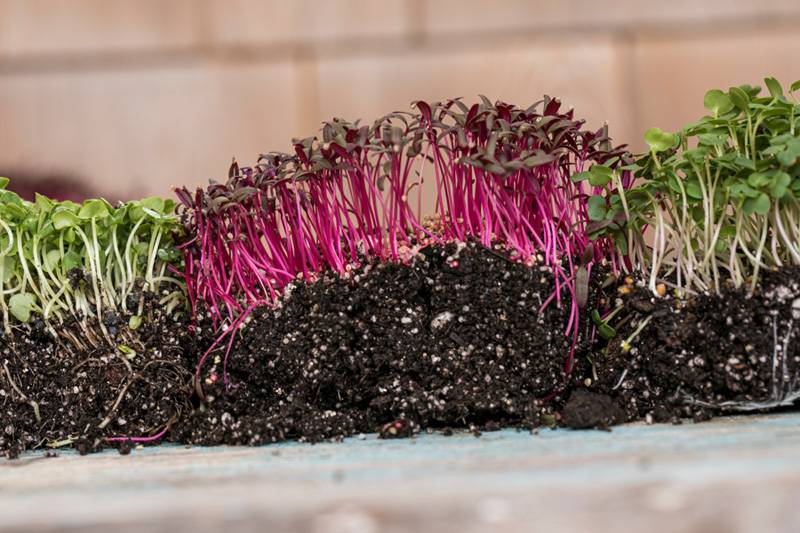
Microgreens sprout from regular vegetable seeds, but are clipped for consumption at only a few weeks old, generally seven to 14 days. The visual appeal, wonderful texture, varied flavors, and high nutritional value make them a hit in the kitchen. Dozens of varieties range from a diminutive purple-stem red cabbage to dark green collards, and from mild-tasting broccoli microgreens to mustards that taste like wasabi. And there’s plenty more to experiment with: microgreen basil to toss on pasta, chia greens, even Asian varieties like napa cabbage or pac choi.

There’s a lot to love about these fluffy little greens, including their small footprint, requiring fewer resources than traditionally farmed food — much less soil, 95 percent less water, and no herbicides, pesticides, or fertilizer. —Photo by Randi Baird
I had guessed growing microgreens would be fairly easy, and probably cheaper than buying them all the time. I didn’t realize how easy! Seeing a friend’s success growing microgreens in her sunroom was the push I needed. I ordered some seeds and to my doorstep came three of my favorites (that I usually buy in the market) — broccoli, arugula, and pea shoot microgreens — and a few smaller-sized seed packets to experiment with, including chives and red amaranth. I don’t remember ordering popcorn shoots — literally popcorn kernels to start — but what the heck.
Before planting, I watched a few YouTube videos. (We’ve linked to a couple of good ones in resources, along with a few good spots to order seeds.)
I put the recommended inch or two of moistened soil in a mix of containers — a few plastic boxes (think strawberry or salad containers), a disposable pie plate, and a few shallow germination trays. Each microgreen has its own rate of growth, so it’s best to plant one variety per container. A fine potting or seedling soil is recommended. After leveling the soil and pressing it down slightly, I scattered the seeds densely on top, misted them with water from a spray bottle, and then covered the containers to keep dark until germination.
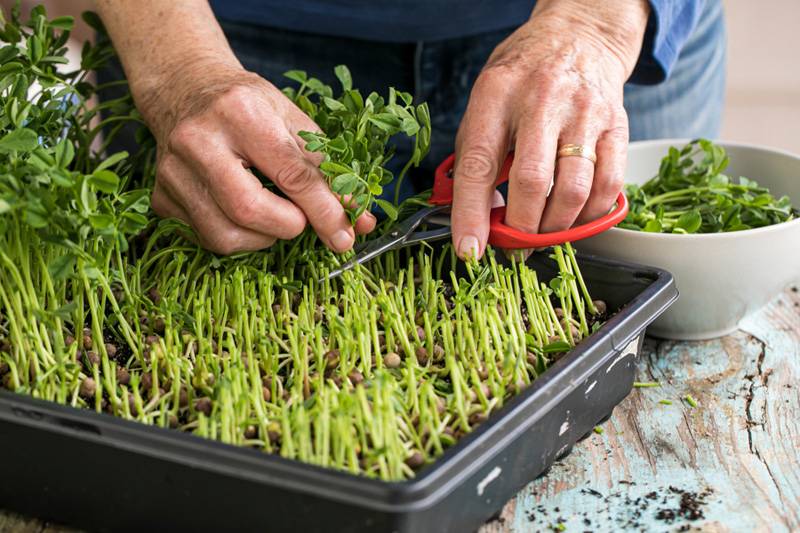
Each day, I lifted the covers to mist and moisten, and in just two days, the broccoli and arugula had started to grow! I uncovered the trays and moved them to the sunniest spot in the house. In about seven to nine days — less than 2 weeks — all were ready to harvest, and test out in the kitchen. If you have fluorescent or LED grow lights for seedlings, go ahead and use those as most commercial microgreen growers do. Water each day as they grow, since soil is shallow and can dry out. For the most part, the microgreens do not regrow after being clipped (with exception of pea shoots and wheat grass), so recycle or reuse the soil as well as the containers (after washing) for your next batches.
And then appreciate the bounty from your own windowsill. In addition to salads of all varieties, microgreens make good toppings for grain bowls, pho/ramen soups, and curry dishes. I’ve used microgreens or peashoots instead of lettuce in fresh spring rolls and mixed them with shredded chicken and slivered veggies for chicken salad combinations. Many stuff them into sandwiches and wraps.
And don’t forget you have the same tool as chefs for beautiful garnishes, atop crispy flounder or a fall tomato soup.
The final upside is the nutritional density of these mini greens, which have higher concentrations of vitamins, carotenoids, and antioxidants — anywhere from five to 40 times that of the mature plants. Broccoli microgreens, for instance, contain 20 to 50 times the chemoprotective compounds found in mature broccoli heads, according to scientists at Johns Hopkins. The seeds contain all the nutrients of the plant, but the first shoots and leaves contain these nutrients in denser forms than larger grown plants, which also include more water, fiber, and starches.
How to Grow
These online videos give step-by-step growing details by experts.
- “Seven Easy Steps for Homegrown Microgreens” from Sow True Seeds, YouTube video (8 min.)
- “How to Grow Microgreens” from “Ask This Old House”; Tim Smith of We Grow Microgreens explains his process (6 min.)
- “How To Grow Microgreens Start to Finish,” from Kevin Espiritu of Epic Gardening, detailed YouTube video (41 min.)
Buying Seeds
Seeds for microgreens are the very same as regular vegetables just harvested early and packaged with larger amounts because you plant them more densely. These seed companies have decent microgreen sections.
- Johnny’s Seeds, employee-owned/organic, has one of the better selections of microgreens seeds.
- High Mowing, also organic.
- True Leaf Market, non-GMO and heirlooms.
Microgreen Recipes
Looking for more ideas on what to do with your microgreens? Check out some of these recipes from author Catherine Walthers.


